Docs Search the docs
  1. Docs
  2. Symbols and the Toolbox

Make a dimension-driven symbol

Lock a symbol to reference lines, then size it by typing its dimensions.

  • Tutorial
  • 4 min
  • Pro
  • Checked with Fluah 1.0.34

Where to find it

ToolboxEdit tool

Steps

  1. In the Toolbox, right-click your tool › Edit tool.
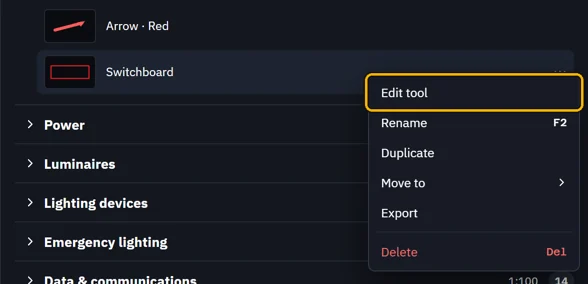
    The Switchboard tool right-clicked, Edit tool marked
  2. It opens in its own tab. Copies are placed by where the centre lines cross.
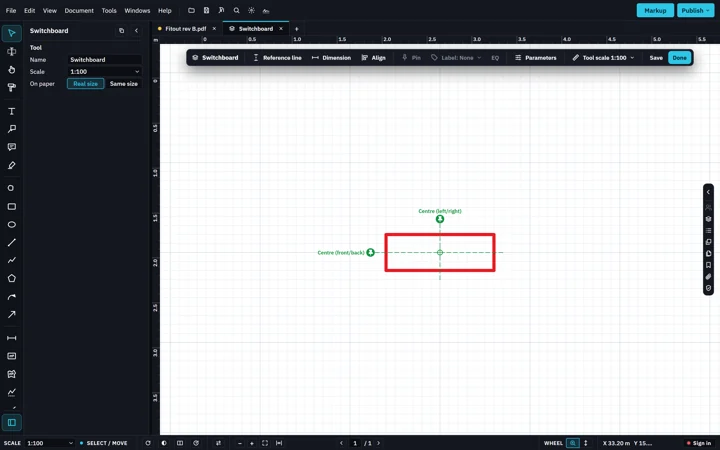
    The Switchboard open in a tab of its own: its bar over the page, the two centre lines crossing in the box
  3. Pick Reference line, then click twice along the left side.
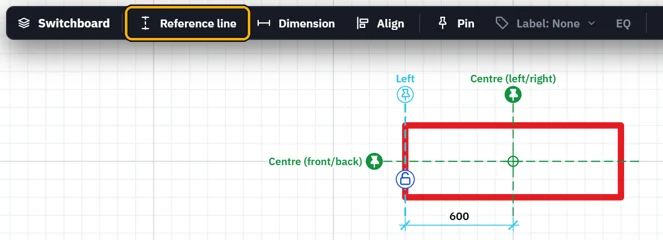
    Reference line marked in the bar, a line drawn on the left side and named Left
  4. Click the padlock to lock that side to the line. Do the same on the right.
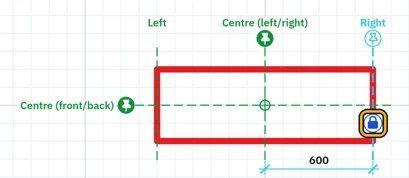
    Left and Right lines on the sides, the Right padlock shut
  5. Pick Dimension. Click Left, the centre line and Right, then a clear spot. Click EQ.
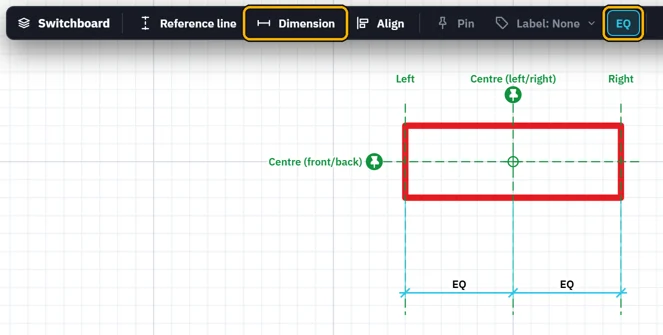
    Dimension and EQ marked in the bar, EQ written on both halves under the box
    Tip. EQ keeps both halves equal, so the symbol grows about its centre.
  6. Dimension Left to Right the same way. Open Label: None › New parameter.
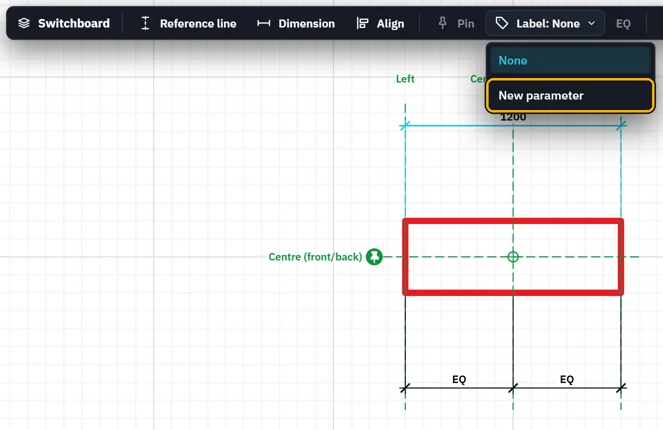
    Label opened over the new dimension, New parameter marked
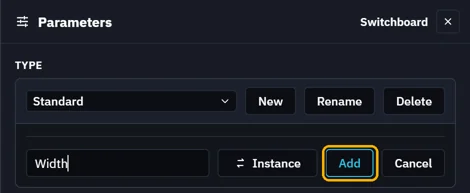
  7. Type Width and click Add.

    Parameters: Width typed as the name, Instance, Add marked
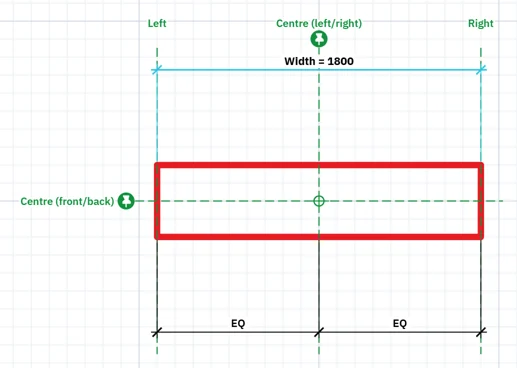
  8. Click the dimension's number, type 1800 and press Enter. The box follows.
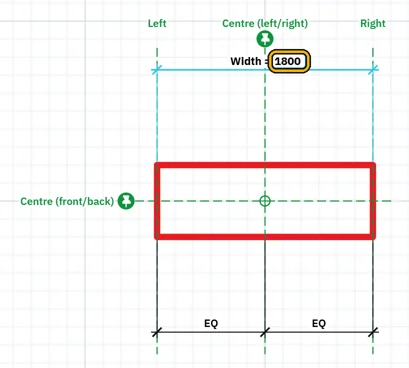
    1800 typed over the Width dimension
    Width = 1800: the box wider on both sides of its centre
  9. Lock lines to the back and front the same way, and label that dimension Depth.
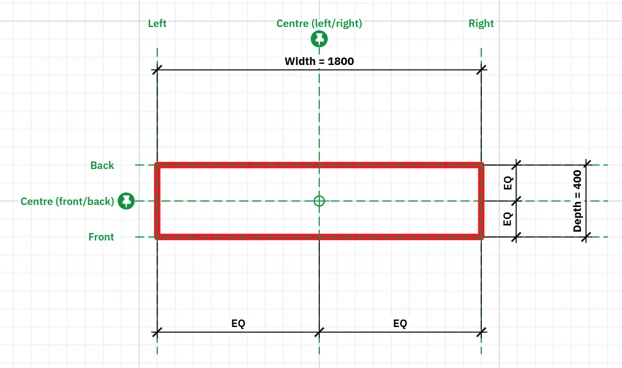
    The Switchboard with Width = 1800 and Depth = 400, each with its EQ dimension
  10. Click Done to save the tool and close its tab.

    Save and Done at the end of the bar, Done marked

What’s next

Was this page helpful?

Updated 6 November 2026